
For this job you will need:
- a small screw driver
- small plastic prying tool
- Bananas! Gaming G502 Lightspeed PCB with Hot Swap Mod
Step 1
Remove Mouse Feet


Step 2
Remove 4 Screws

Step 3
Pry carefully along edges to release tabs. Use care and patience!

Step 4

Lift tabs to disconnect Ribbon cables. Disconnect Battery Cable.

Step 5
Remove 3 Screws for "G" Cover (the one on the right is somewhat hidden), remove cover.

Step 6
Remove 1 Screw and Remove LED chute

Step 7
Remove 4 Screws for Main Buttons, Remove Main Buttons.

Step 8
Remove 4 Screws from inner frame

Remove 2 Screws from inner frame

Step 9
Remove inner assembly
Step 10
Remove 2 screws on hump, gently pry up and remove hump.

Step 11
Turn over and remove 1 screw for wheel assembly.
![]()
Step 12
Slide out Pin to the left.
![]()
Step 13
Remove wheel assembly, careful of the 2 springs at the top.

Step 14
Remove 2 screws for Pin Holder.

Remove 5 Screws for PCB.

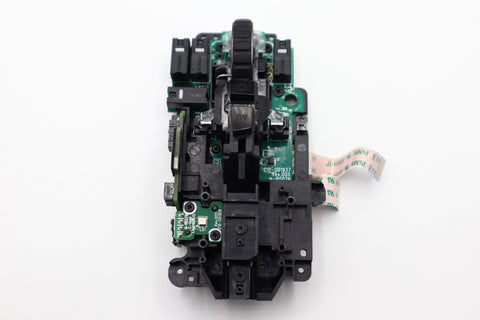
Step 15
Remove PCB

Step 16
Installation of the Bananas! Gaming Hot Swap PCB is the reverse of removal.
Tips
- Be gentle and patient with disassembly/ assembly
- Use this opportunity to clean any dust & dirt from the inside of your mouse. A small soft brush works great.
- Take care not to overtighten the screws, light and easy does it.
(We assume no liability for possibly damaged mice)